Making Templates
Texpile’s template editor lets you create custom templates and upload supporting files such as .cls class files, images, fonts, and more.
Creating a Template
Go to app.texpile.com/templates and click New Template in the top-right corner.
Note: The template editor is only supported on desktop devices.
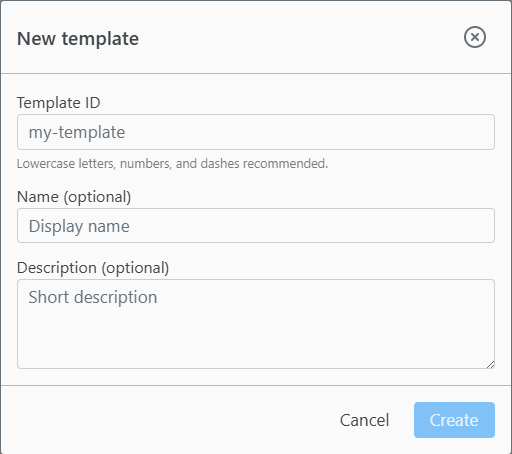
In the modal, give your template a name. The template ID must be unique. You cannot have two templates with the same ID.
Editor Overview
Once you create a template and open the editor, you will see:
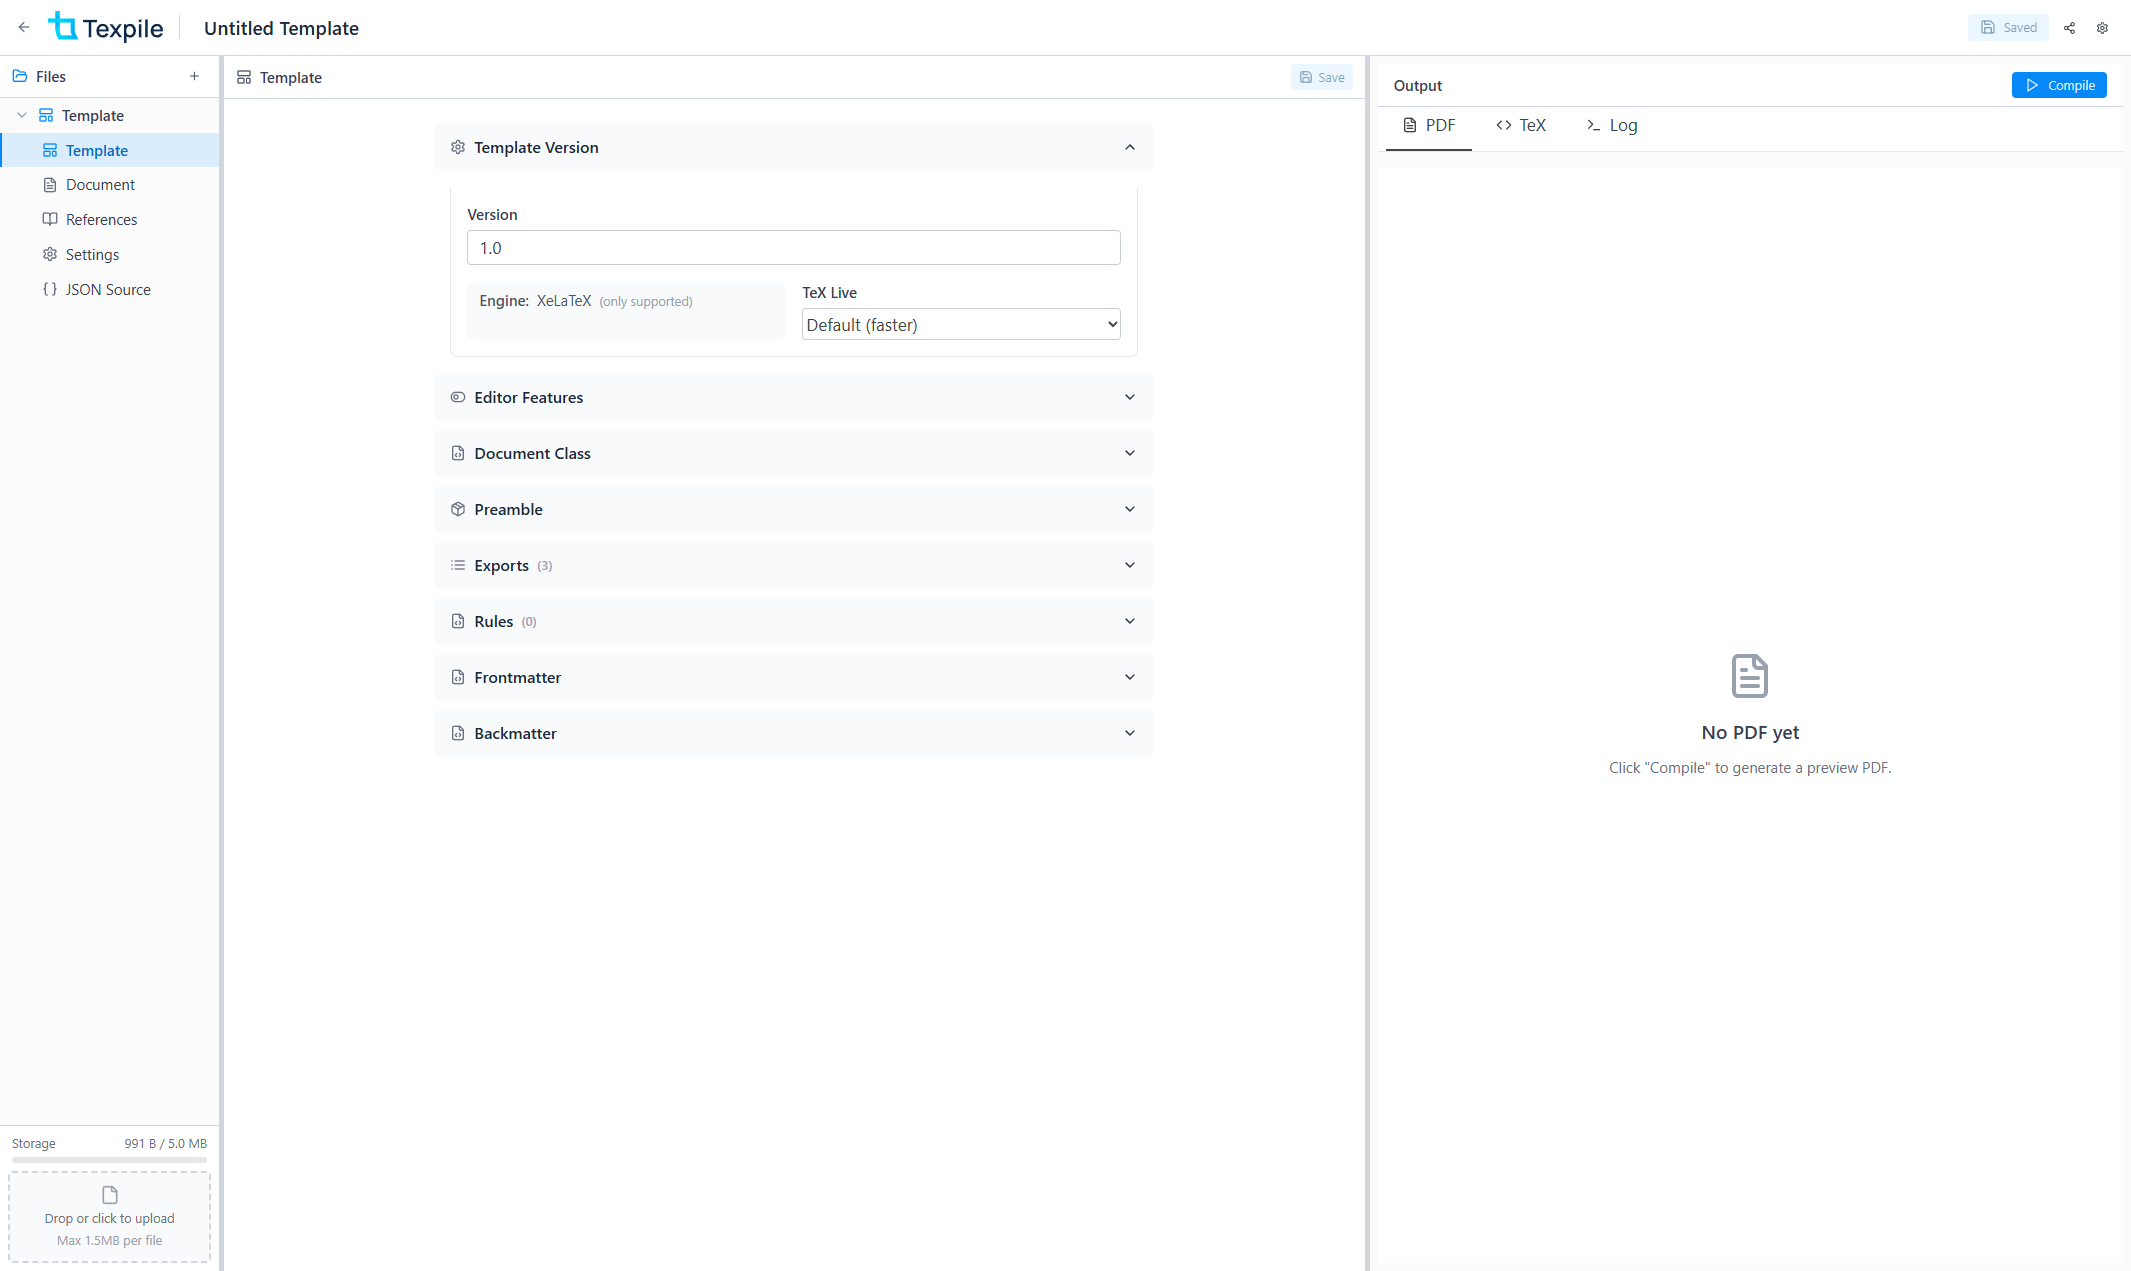
The template workspace works like a normal LaTeX workspace. You can add custom images, fonts, .cls files, and other supporting files.
How Templates Work
When you write a document in Texpile, the editor only stores the content you type (headings, paragraphs, images, tables, etc.). It does not know what LaTeX code to generate. Templates tell Texpile how to turn your content into a complete LaTeX document.
For example, in most templates a “Heading 1” in the editor becomes \section{Heading 1}. But templates can override this and generate any arbitrary code, such as \custommacro{Heading 1}.
The Template Folder
You will see an undeletable folder called Template. This is where you configure how Texpile generates LaTeX code. If you open it, you will see:
- Template: where you define how Texpile converts editor content into LaTeX code
- Document: an example document that is loaded when someone creates a project from your template
- References: example bibliography references
- Settings: template settings (exports, metadata fields, etc.)
- JSON Source: the raw JSON source of the template. Changes made in Template, Document, References, and Settings are reflected in the JSON Source and vice versa.
The Document, References, and Settings tabs work exactly the same as in a normal Texpile document. You can click the Compile button in the top-right corner to preview the output PDF using the example document and references you’ve provided.
Building a Template
If you’re familiar with LaTeX, you know a document has this structure:
\documentclass[options]{class}
% preamble (packages and configuration)
\begin{document}
% frontmatter (title page, abstract, etc.)
Your actual document content
% backmatter (bibliography, appendices, etc.)
\end{document}
The Texpile editor only handles your actual document content. Everything else (the document class, preamble, frontmatter, and backmatter) is defined by the template.
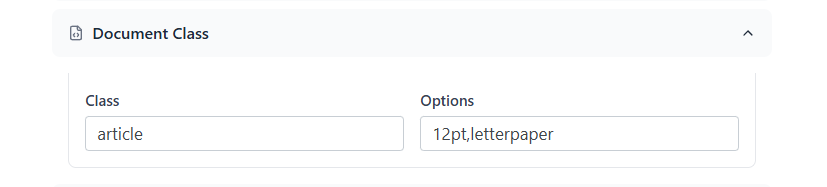
Document Class
You can set the document class (e.g., article, report, IEEEtran) and its options in the template editor.
Preamble, Frontmatter, and Backmatter
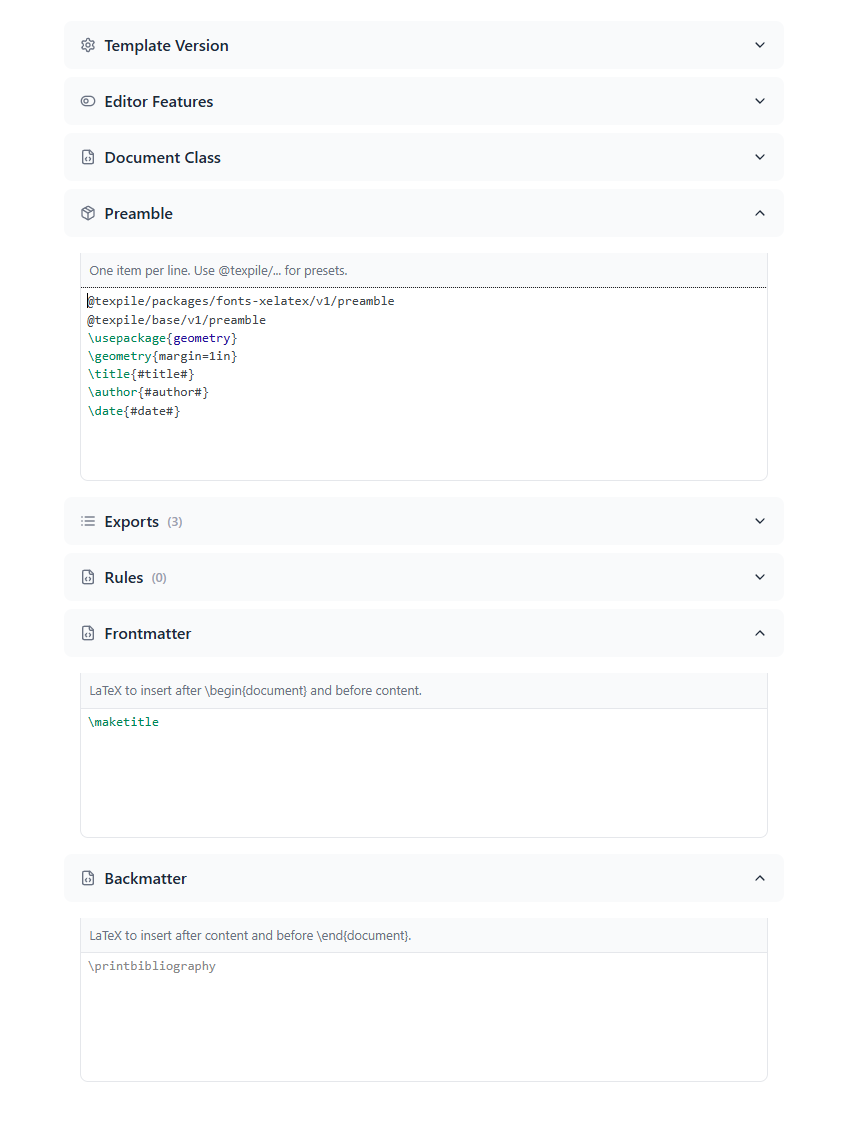
In the template editor, you can paste LaTeX code directly into each section:
- Preamble: package imports and configuration (e.g.,
\usepackage{geometry}) - Frontmatter: content that appears before the main body (e.g.,
\maketitle, abstract) - Backmatter: content that appears after the main body (e.g.,
\printbibliography)
Texpile automatically wraps everything with \documentclass, \begin{document}, and \end{document}, so you don’t need to include those.
For example, a simple preamble and frontmatter might look like:
% Preamble
\usepackage{geometry}
\geometry{margin=1in}
% Frontmatter
\title{Title here}
\author{Author name}
\date{\today}
\maketitleExport Variables
But what if you want each document to have a different title or author? You don’t need a separate template for each one. This is where export variables come in.
Export variables are placeholders that users can fill in through the Settings menu when they create a document from your template. They look like #variablename#, for example #title#, #author#, or #date#.
Note: Variable names cannot begin with a number (e.g.,
#1variable#is invalid).
To define a variable, open the Exports section in the template editor.
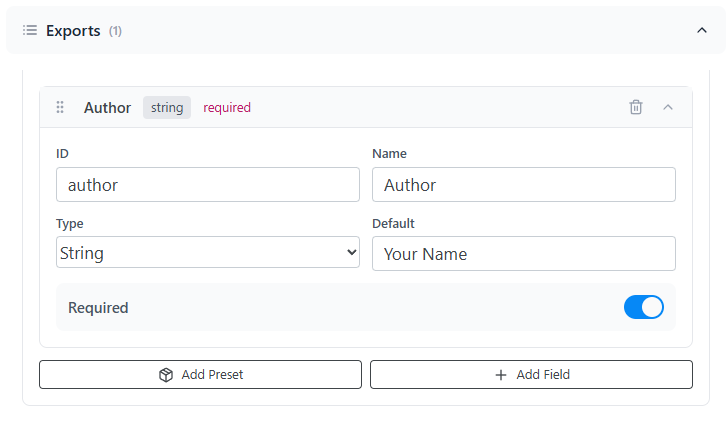
Click Add Field to create a new export. Each export has the following properties:
- ID: the variable name, used as the placeholder (e.g., an ID of
authorbecomes#author#). Must be unique. - Name: the label shown to users in the Settings menu (e.g., “Author” or “Your Name”).
- Type: the type of input field. Depending on the type, additional options may be available. See Export Types for details.
- Default: the fallback value used if the user does not provide one.
- Required: if enabled and the user leaves the field empty, the default value is used instead.
With exports defined, you can use the variables in your frontmatter instead of hardcoded values:
\title{#title#}
\author{#author#}
\date{#date#}
\maketitle
Now when you fill in the Title and Author fields in Settings, click Save, and compile, the placeholders get replaced with their values.
Presets
You don’t have to write everything from scratch. Texpile provides presets, which are reusable building blocks that can be used across your template. For example, instead of manually defining a Title field, you can just add @texpile/base/title and it handles everything.
Presets work in exports, document sections (preamble, frontmatter, backmatter), and rules. See Presets for full details.
Next Steps
- Presets: reusable building blocks for exports, document sections, and rules
- Export Types: the different field types (string, rich text, select, list, template block)
- Editor Features: controlling which UI features are available in your template
- Transpilation Rules: customizing how editor content maps to LaTeX code